
Below, we’ll go over the five steps to sketching your own anime, complete with proportional guidelines, hairstyle suggestions, and detailed directions for drawing those instantly recognisable anime eyes.
Step 1: Create The Basic Structure Of The Face
In the first step, you’ll sketch out the basic shape of the character’s face. A character’s head and face in anime can be structured in a variety of ways, but all artists begin with the same fundamental premise. Create a circle, then connect its centre to the outside of the page using a horizontal and vertical line.
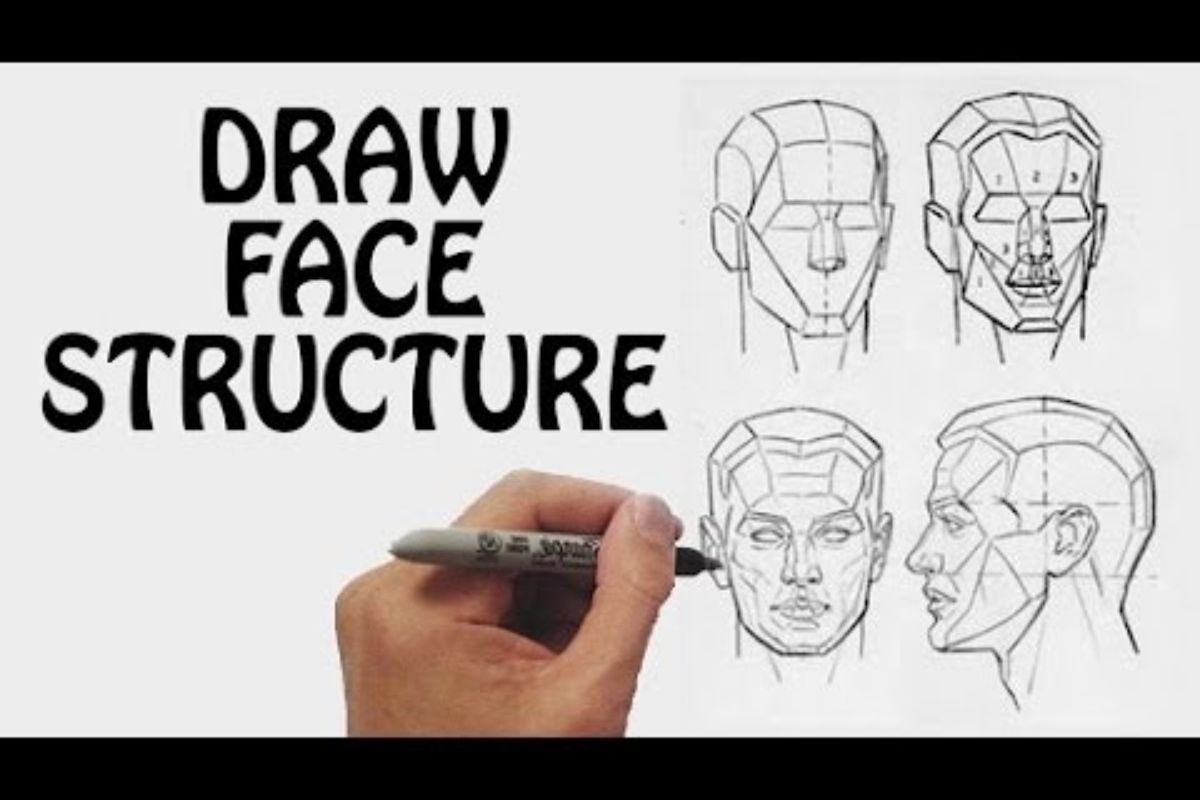
In most cases, the eyes will go on or just below the horizontal line, the mouth will go at the bottom of the circle, and the nose will go in the middle of the two. The lower jaw will drop below the arc.
Step 2: Add Facial Features
Eyes
The eyes of an anime character are instantly recognisable, therefore we’ll show you how to draw them in a few easy steps. Create a curved upper eyelid in your sketch, then stretch a small line down from the eye’s outer corner. If you want a more gentle appearance, leave the inner corner of one eye unclosed. The iris should be represented by a circle placed in the centre of the eye. In the centre of the iris, you should draw a smaller circle for the pupil.

Simply by inserting one or two more spheres into the iris, you may produce primary and secondary light reflections. Fill in the pupil with a darker color at the top and a lighter one at the bottom to make a gradient. All light refractions should be kept white. Apply eyelashes to both the upper and lower lids. There are, of course, many other options when it comes to drawing anime eyes, so don’t be afraid to try out different techniques and develop your distinct look.
Nose And Mouth

As a rule, the nose and mouth of a cartoon figure will be significantly smaller and less detailed than their eyes. Representing instance, the nose might be represented by only two little lines for the nostrils. The mouth, likewise, could only be a curve.
Step 3: Draw the Hair
It’s important to know that there are different ways to draw hair in anime, so you can choose the method that works best for you as you learn. Different painters have different preferences; some prefer dramatic, angular styles, while others choose more fluid, free-form approaches.
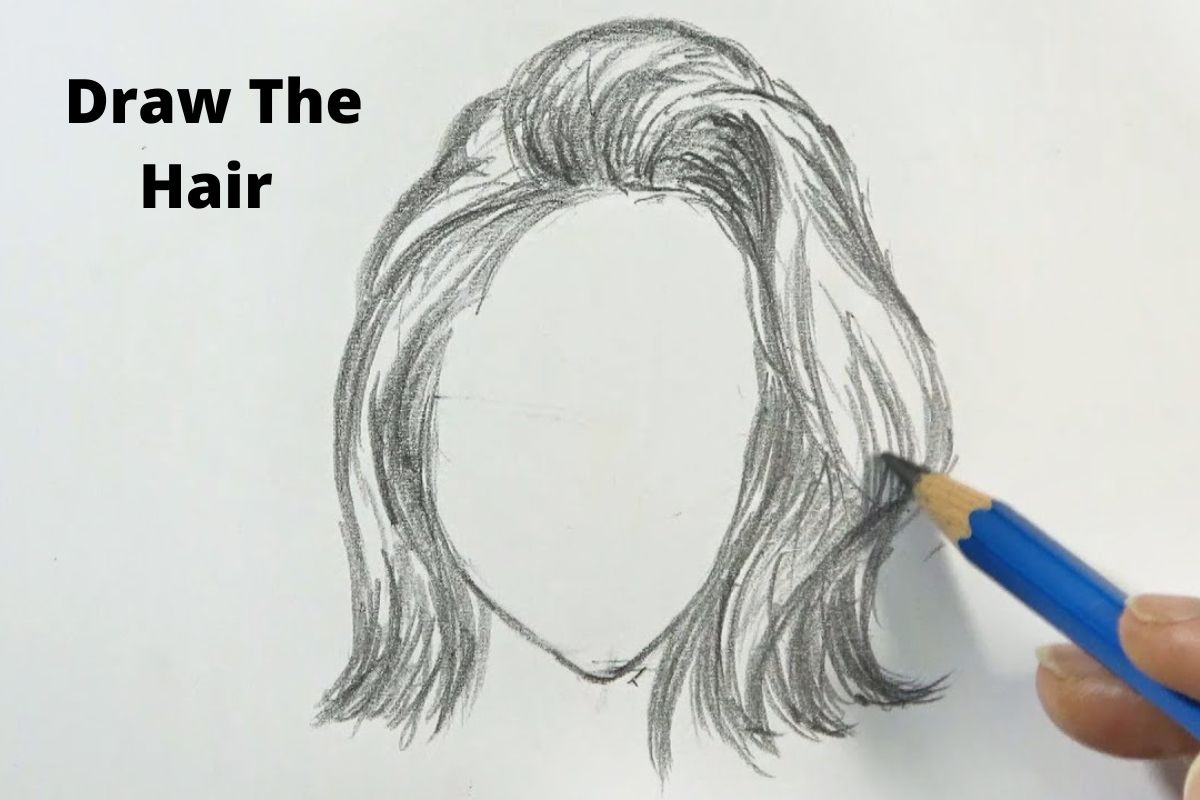
Starting with rapid, light strokes, bring the bangs down to the eyes to mimic the free-flowing style of the picture below. The remaining hair around the head should be drawn as a framing around the face. Make sure the hair on top of the head is longer than the circle you sketched at first. To rephrase, the hair on the top of the head of the character shouldn’t be flat against the scalp.
Step 4: Add the Body
Step-by-step instructions for drawing a female anime character’s physique will be provided next. A few basic geometric forms serve as the basis for the body’s physiology: a rectangle for the torso, an oval for the hips, and a few small circles for the shoulders and knees.
Next, finish off the outline of the upper body by drawing a line from the bottom of the rib cage to the bottom of the hips to represent a waist. The length of the character’s upper body (from the top of the head to the waist) should be reflected in the length of the legs you design next.

Completing the figure by including the arms. The arm (hand included) should be extended to around mid-thigh, with the elbow parallel to the character’s waist.
Step 5: Add Details And Ink The Drawing
You should now have a complete drawing of your anime protagonist. You may now customise your character down to the last detail, including clothing and footwear.
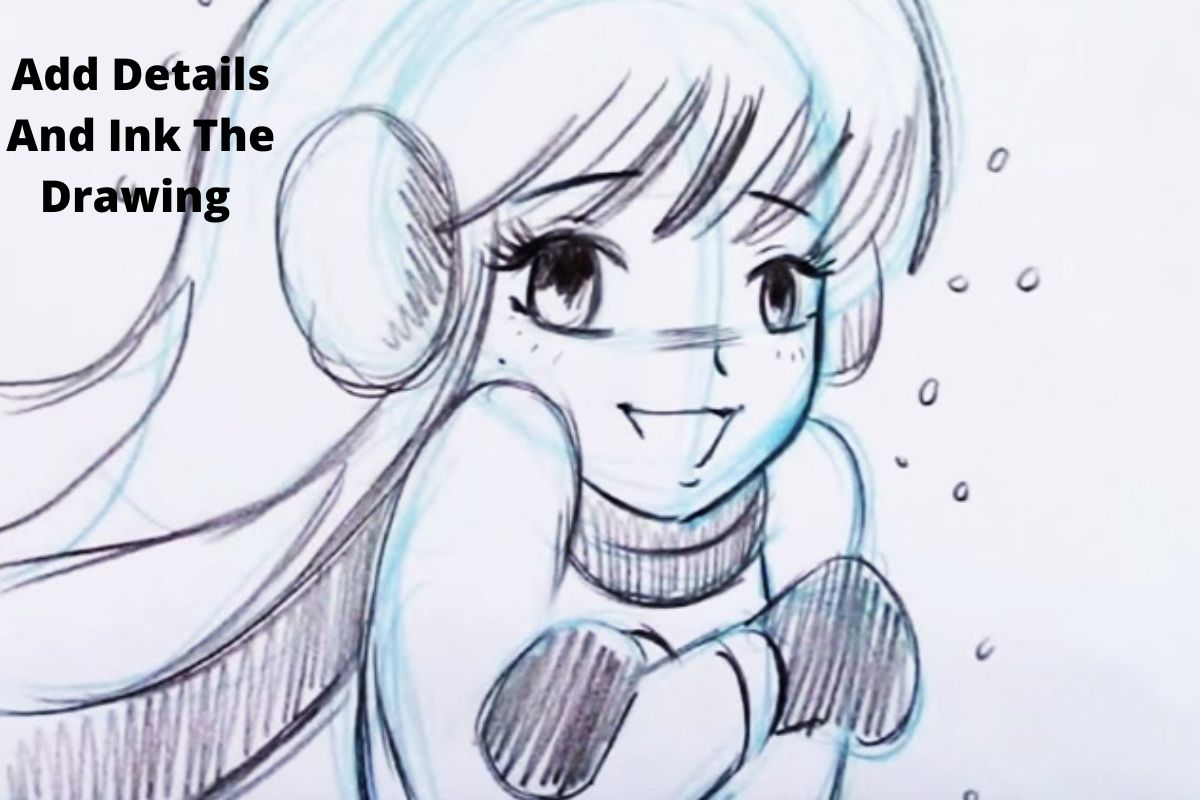
When the sketch is complete to your satisfaction, you can ink over the lines to make it official. While a black pen will be used for the majority of the inking, a white jelly pen can be useful for adding highlights such as the reflection spots in the character’s eyes. Additional colour can be added with coloured pencils or another medium.
Follow digitalnewsexpert.com for more updates.
Leave a Reply